Your medical cannabis journey simplified: find partnered dispensaries, explore pricing options, earn rewards, and get answers to FAQs, all in one spot.
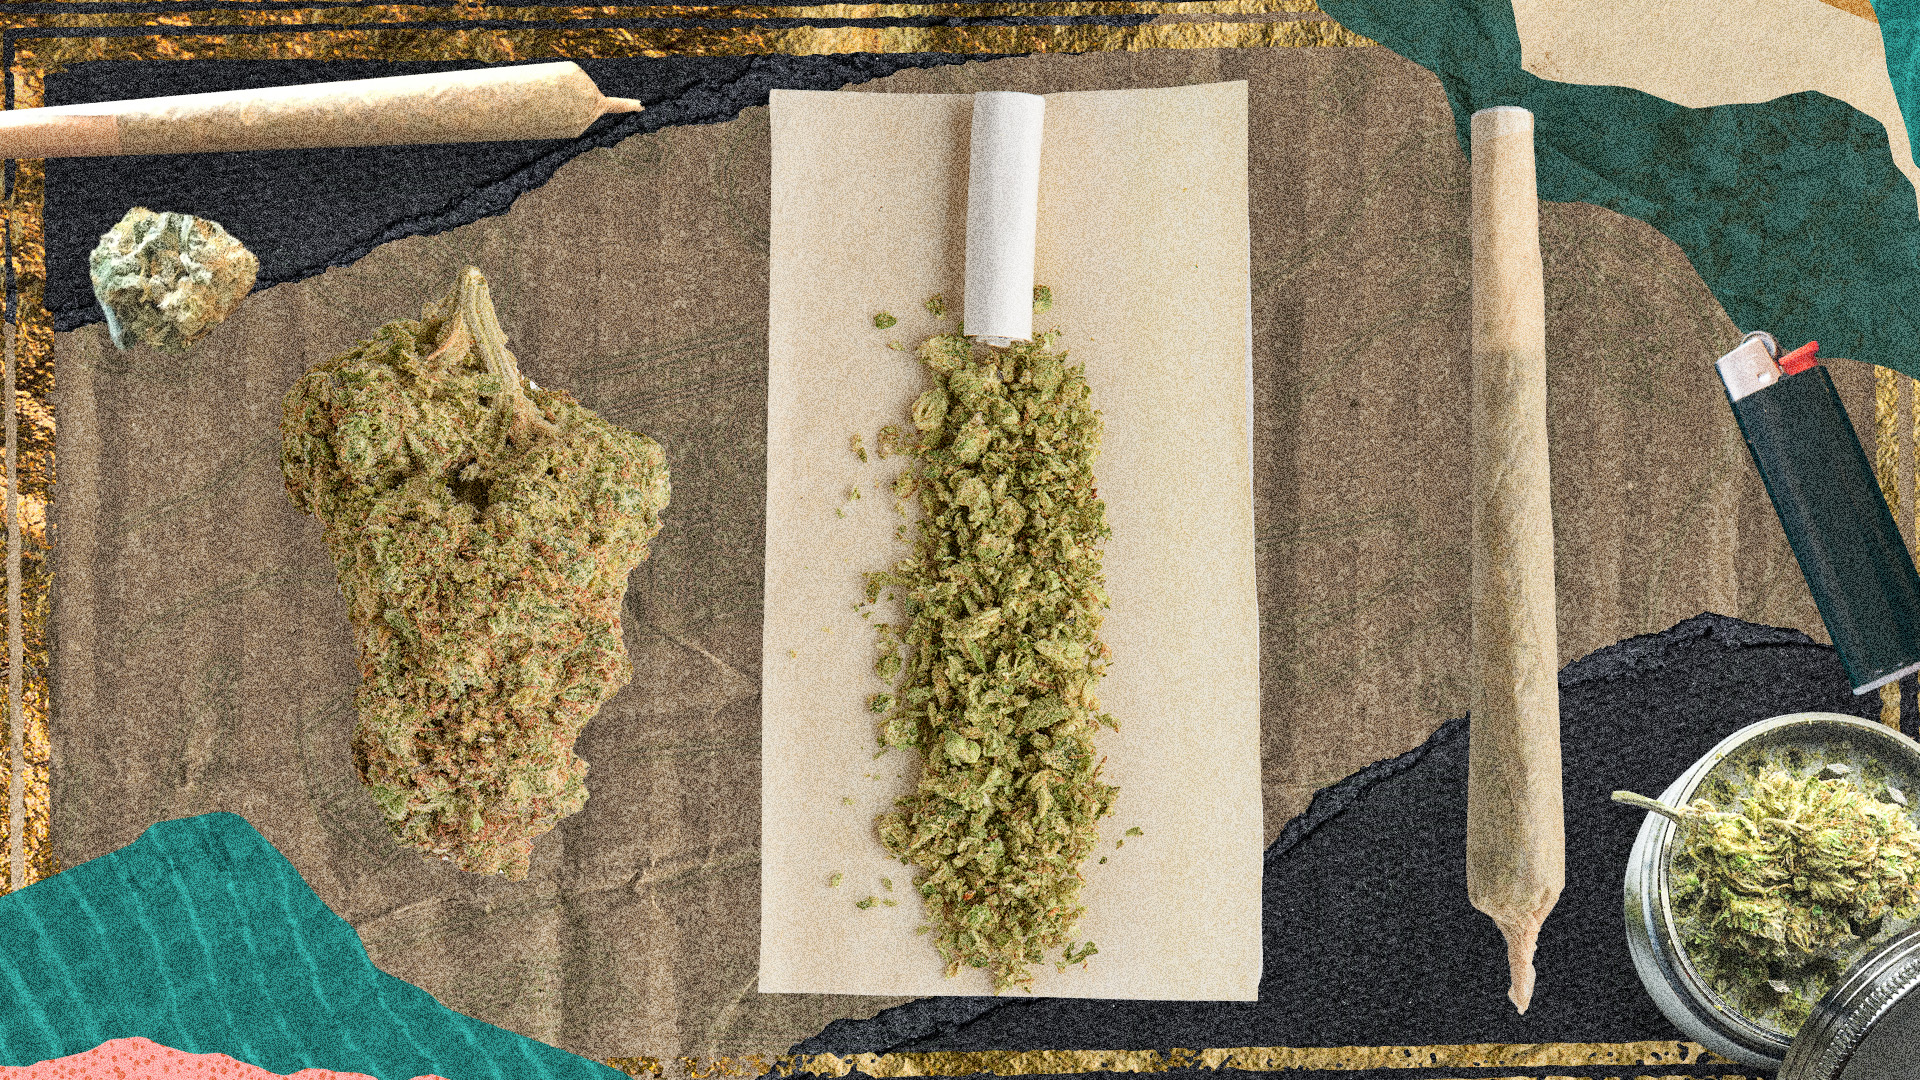
Joints are one of the most convenient ways to consume cannabis. However, learning how to roll a joint can be a bit of a challenge for beginners.
Read the following step-by-step guide to learn how to roll a joint. You’ll never have to rely on anyone else for the optimal smoking experience again.
How to Roll a Joint: A Step-by-Step Guide (With Pictures!)
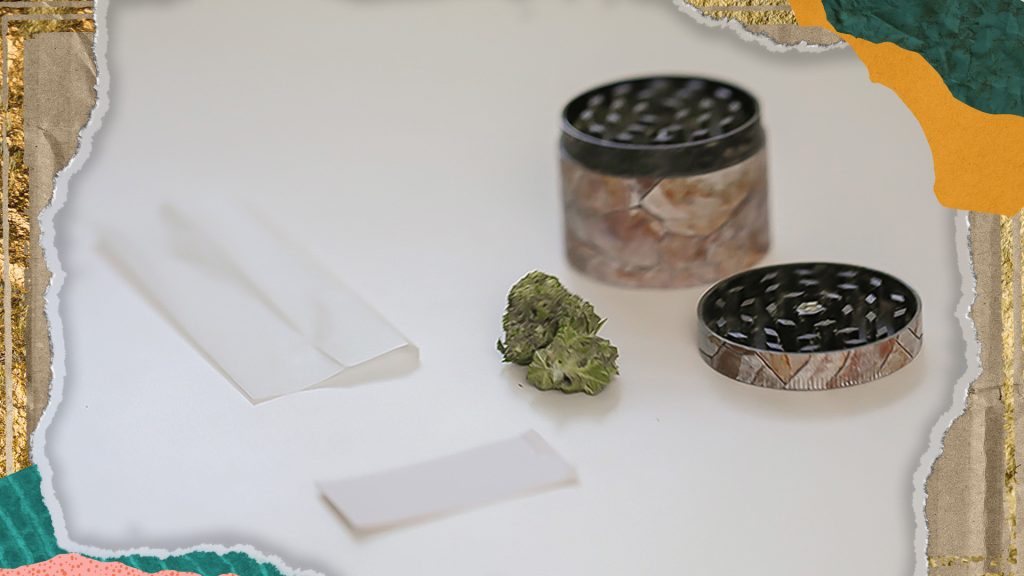
Supplies Needed:
Rolling Tray
Grinder
Rolling Paper
Filter Tip
Lighter
1. Pick the Perfect Cannabis
You can’t roll the perfect joint without the perfect cannabis.
When selecting a strain, consider your desired experience first and foremost. Your primary consideration should be whether the strain is indica or sativa. If you seek a relaxed and calming experience, opt for an indica strain. Conversely, if you’re aiming for energized creativity, a sativa strain might be more suitable for you. If you’re looking for a balanced mix of both, try a hybrid strain.
Beyond indica vs. sativa vs. hybrid preferences, cannabis strains contain different terpenes and cannabinoids that help influence what effects the strain induces.
2. Choose the Rolling Paper or Cone That Suits You Best
When choosing your rolling paper, consider key factors such as:
Size – Rolling papers come in a variety of sizes. 1¼ inch papers are the standard for rolling joints because they’re easy to roll and can fit a crutch or filter. They are 1¼ inches wide and 3 inches long. Other size options include single-wide or king-size papers.
Material – Whether you’re looking for hemp papers, rice papers, bamboo papers, or raw unbleached papers, rolling papers come in a variety of materials. It all comes down to personal preference.
Convenience – If you’d like to cut down on some of the hassle, look for prerolled cones at your local shop. These cones already come equipped with a filter tip and a pre-rolled paper. Simply pack the cone with your ground cannabis, and you’re ready to smoke!
Flavor & Style – Looking for something a little fancier? Check out gold rolling papers, flavored rolling papers, or cones with decorative patterns.
Once you choose the cone or rolling paper that’s right for you, you’re finally ready to start your joint rolling journey.
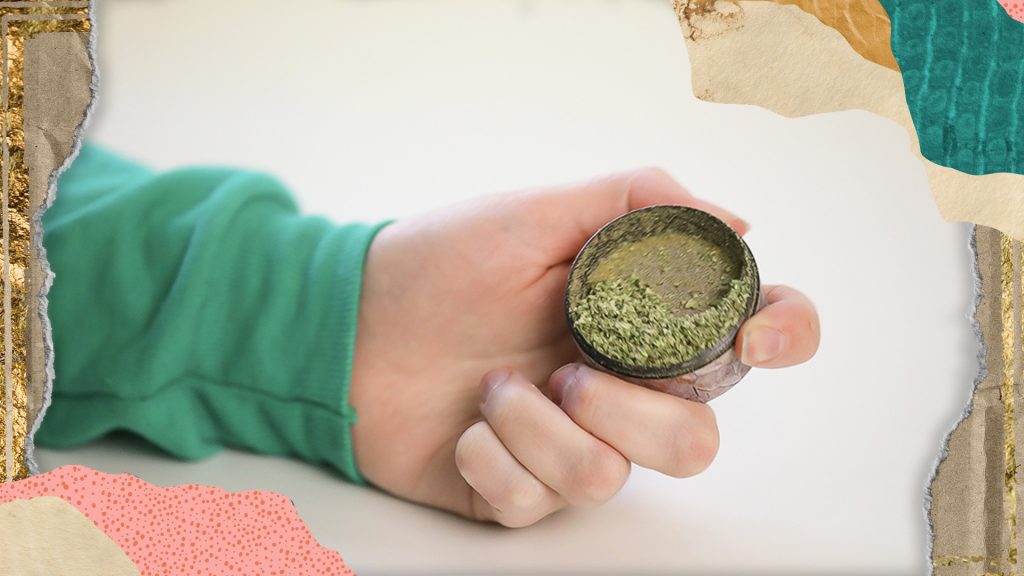
3. Grind your cannabis
Once you’ve chosen your preferred strain, you’re ready to start rolling a joint. Breaking up your cannabis into a fine, workable texture will not only make it easier to roll with, but it’ll ensure a more even burn.
Here are some common options for breaking up or grinding your flower:
Breaking Up Cannabis By Hand: Breaking up cannabis by hand is time-consuming. You want to make sure to have your material evenly broken up. You don’t want to leave big chunks as they can cause a joint to burn improperly.
Breaking Up Cannabis With A Grinder: Using a grinder to break up cannabis is efficient but comes at a slight cost. For an extra kick, incorporate some of the kief that falls into the bottom tray of your grinder. This kief holds a lot of the buds’ trichomes, which heavily contribute to flavor and potency.
We recommend starting with around a 1/2 gram of ground cannabis flower. More advanced joint-rollers can use up to a gram (or more!) of cannabis.
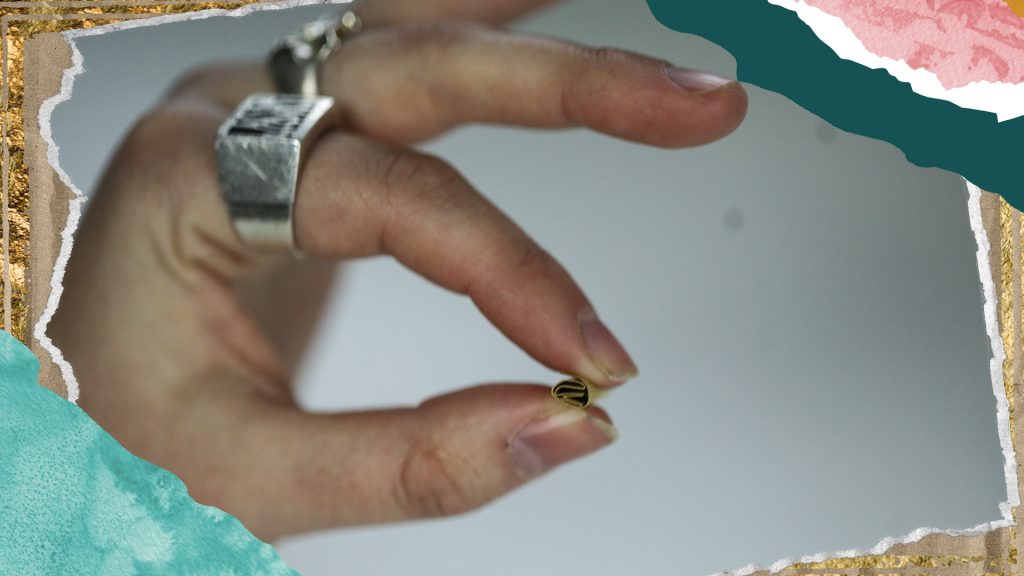
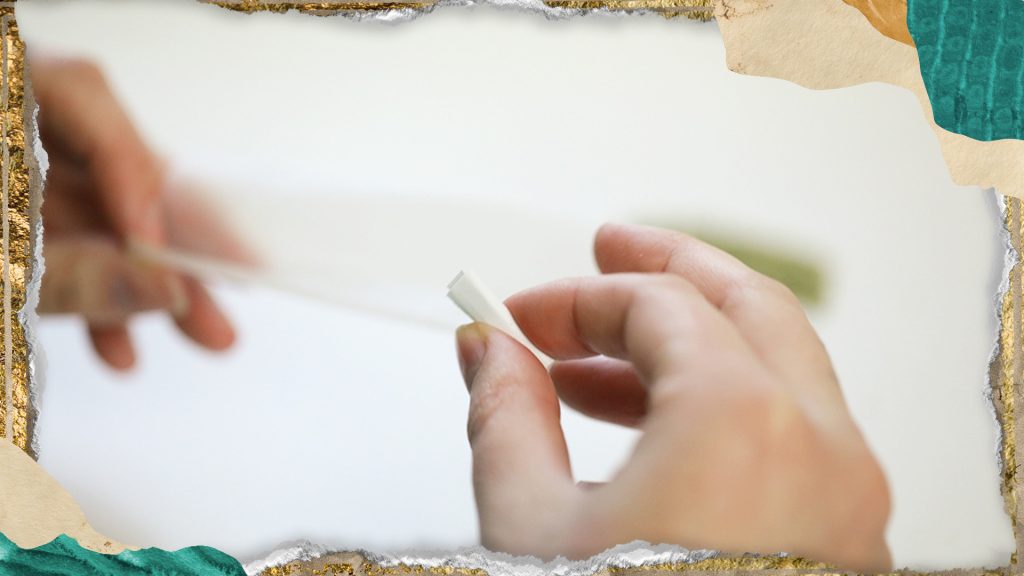
4. Make a crutch or filter
If you don’t have filter tips, you can make your own out of a ripped index card, a business card, or lightweight cardboard (like the flap of your pack of rolling papers). The easiest way to make a filter tip is to accordion fold about half of your tip. Once you’ve made those first few folds, roll the remaining material completely around the folded part.
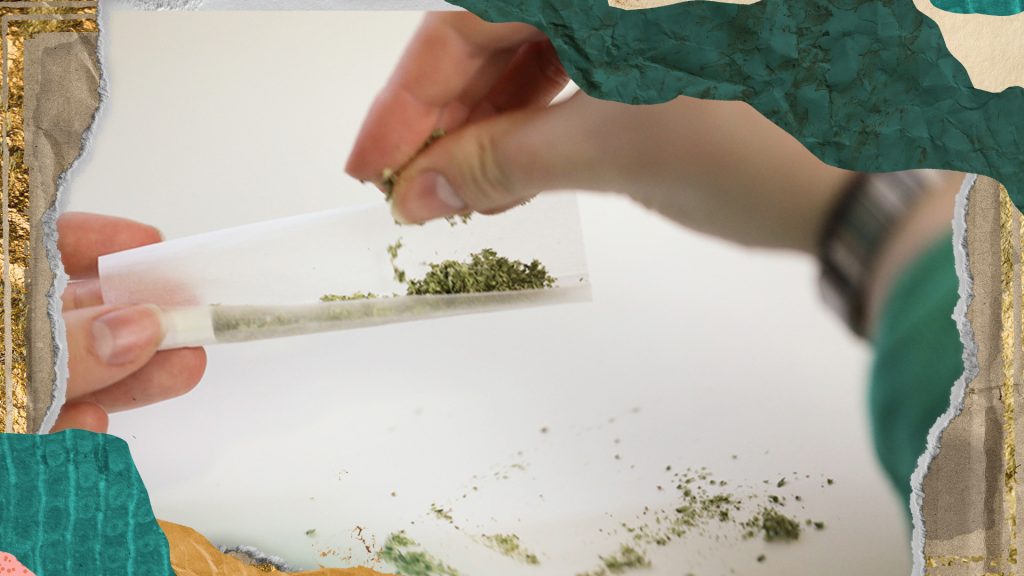
5. Prepare your paper
Hold the rolling paper in your left hand. Use your index finger to create a bed for your ground cannabis flower by curling the paper around your finger.
Place a crutch or filter tip at the end of the paper in place of your index finger.
See If You Qualify For Medical Marijuana -Select Your State!
Select Your State
Alabama
Alaska
Arizona
Arkansas
California
Colorado
Connecticut
Delaware
Florida
Georgia
Hawaii
Idaho
Illinois
Indiana
Iowa
Kansas
Kentucky
Louisiana
Maine
Maryland
Massachusetts
Michigan
Minnesota
Mississippi
Missouri
Montana
Nebraska
Nevada
New Hampshire
New Jersey
New Mexico
New York
North Carolina
North Dakota
Ohio
Oklahoma
Oregon
Pennsylvania
Rhode Island
South Carolina
South Dakota
Tennessee
Texas
Utah
Vermont
Virginia
Washington
West Virginia
Wisconsin
Wyoming
Never miss a post
Get updates on cannabis culture, new research, and expert insights
6. Add ground cannabis to the paper in an evenly distributed line from end to end.
Start adding ground cannabis to your rolling paper bed. You’ll want to pack your cannabis flower firmly enough to ensure an even burn. However, avoid packing it too tightly, or you risk restricting airflow.
Hold your joint over your rolling tray to catch any loose cannabis that you might spill.
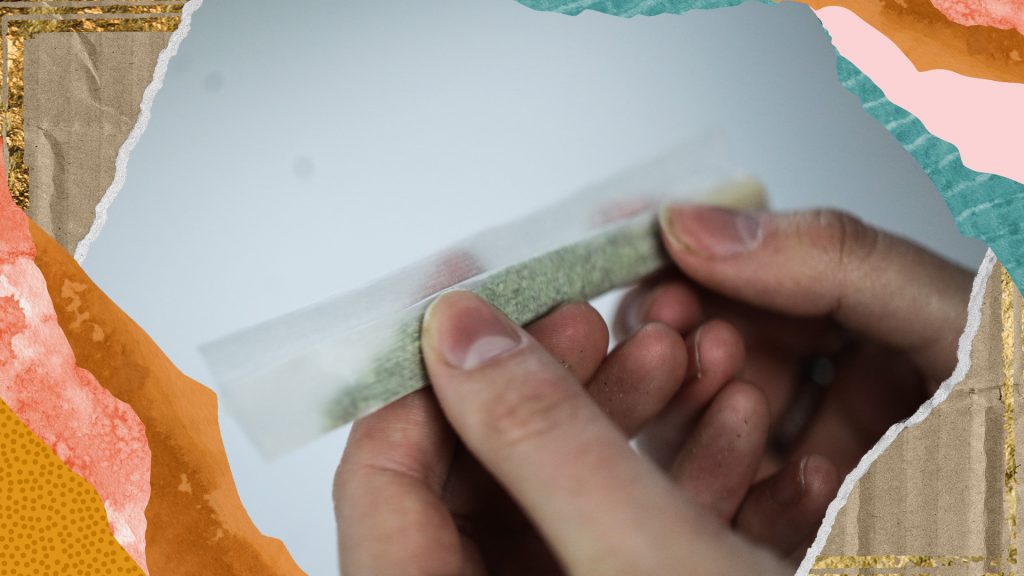
7. Roll the paper back and forth between your fingers until it forms the correct shape.
As you roll, your paper will start to naturally take a rolled shape. Try to refrain from rolling it super tight or leaving the outer paper extremely loose.
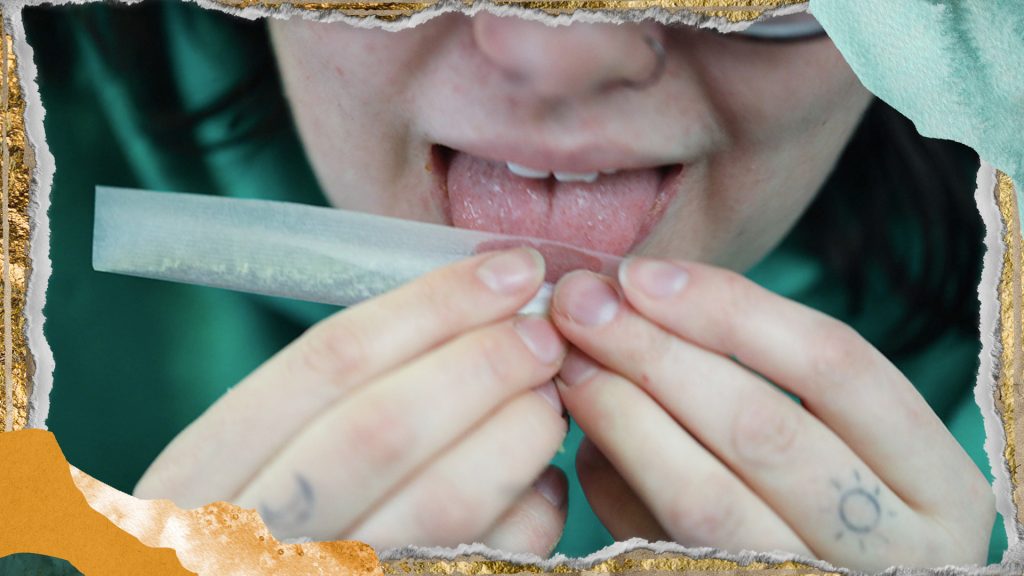
8. Lick the end of the paper and press it against the rolled paper to form a seal.
Once your paper is sufficiently rolled into a cone shape, begin sealing it by tucking the unglued side of the paper into the roll, then roll it up.
Lick a small portion of the loose side to securely seal one end of the joint, using just enough moisture to wet the paper without ripping it. Begin with the crutch side, as it can aid in guiding the paper while it rolls around itself.
Once one end of the paper is securely sealed, work your way down the seam by tucking and sealing the joint.
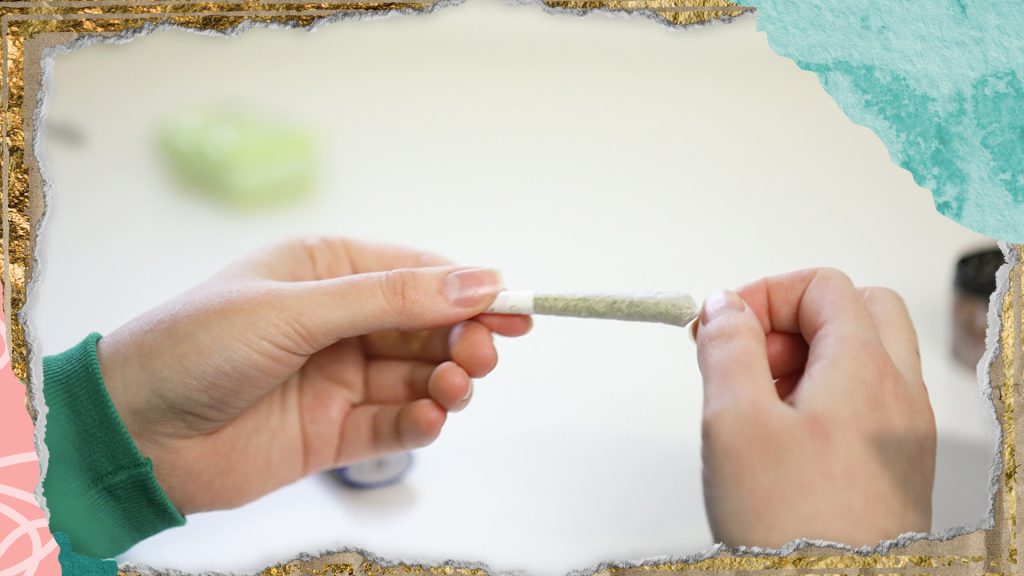
9. Twist and finish the joint.
After you’ve rolled your joint, pack the ground weed in with a pen, a chopstick, or another thin device. Twist the open end of the joint to ensure the ground bud won’t fall out.
Optional:
If your rolling paper is still a little damp from the last step, run the flame of your lighter quickly along the length of your joint. Just don’t get too close, or you’ll risk watching as your whole joint burns in front of your eyes.
10. Spark Up and Enjoy
When lighting your joint, hold your lighter to the twisted tip. Roll the joint between your fingers to ensure an even lighting.
Pro tip: Joints should NOT be lit like a cigarette. If you light up while sucking air through the joint, you’ll once again risk burning the entire joint in one go.
Steps to Pack the Perfect Cone
If joint rolling isn’t your specialty but you still want the perfect joint or spliff, consider purchasing cones from your local head shop. These pre-rolled papers are the peak of convenience — simply pack them, and you’re ready to smoke.
Purchase your preferred cannabis.
Grind your cannabis in your preferred method.
Grab your cone.
Add small amounts of ground cannabis to the cone at a time and then use the stick provided to push the cannabis down toward the filter evenly. You can also tap the cone a few times on a hard surface to pack the cannabis into place as well.
Repeat step 4 until your cone is your desired size and then twist the tip to ensure the cannabis does not fall out.
You’ll know you have the perfect joint when it burns slow and beautifully, tastes amazing, and provides the potent effects you desire.
This article was originally published in 2021 and most recently updated February 2024.
We seek to help people live better lives by changing the stigma on cannabis. Our aim is to change the image of alternative medicine by creating more ease for all users, more growth in science, more access for all patients, and more transparency in the industry.
The relationship between cannabis and thyroid conditions is more complicated than most people expect, and the research does not point in a single direction. If you have a thyroid condition and you are wondering whether cannabis could help, the honest answer is that the science is limited, the effects differ depending on whether your thyroid…
Combining cannabis and psilocybin can enhance therapeutic effects for some conditions, but the interaction requires careful consideration of safety protocols and timing. While both substances show promise for mental health treatment individually, their combined use introduces additional risks and contraindications that users must understand before proceeding. This guide covers the current research, safety considerations, and…
Durban Poison delivers pure sativa energy without the anxiety that many uplifting strains can trigger. This South African landrace has earned its reputation as cannabis “espresso” through decades of consistent, clear-headed effects that keep you productive throughout the day. As one of the few remaining pure sativa landrace strains, Durban Poison offers something increasingly rare…
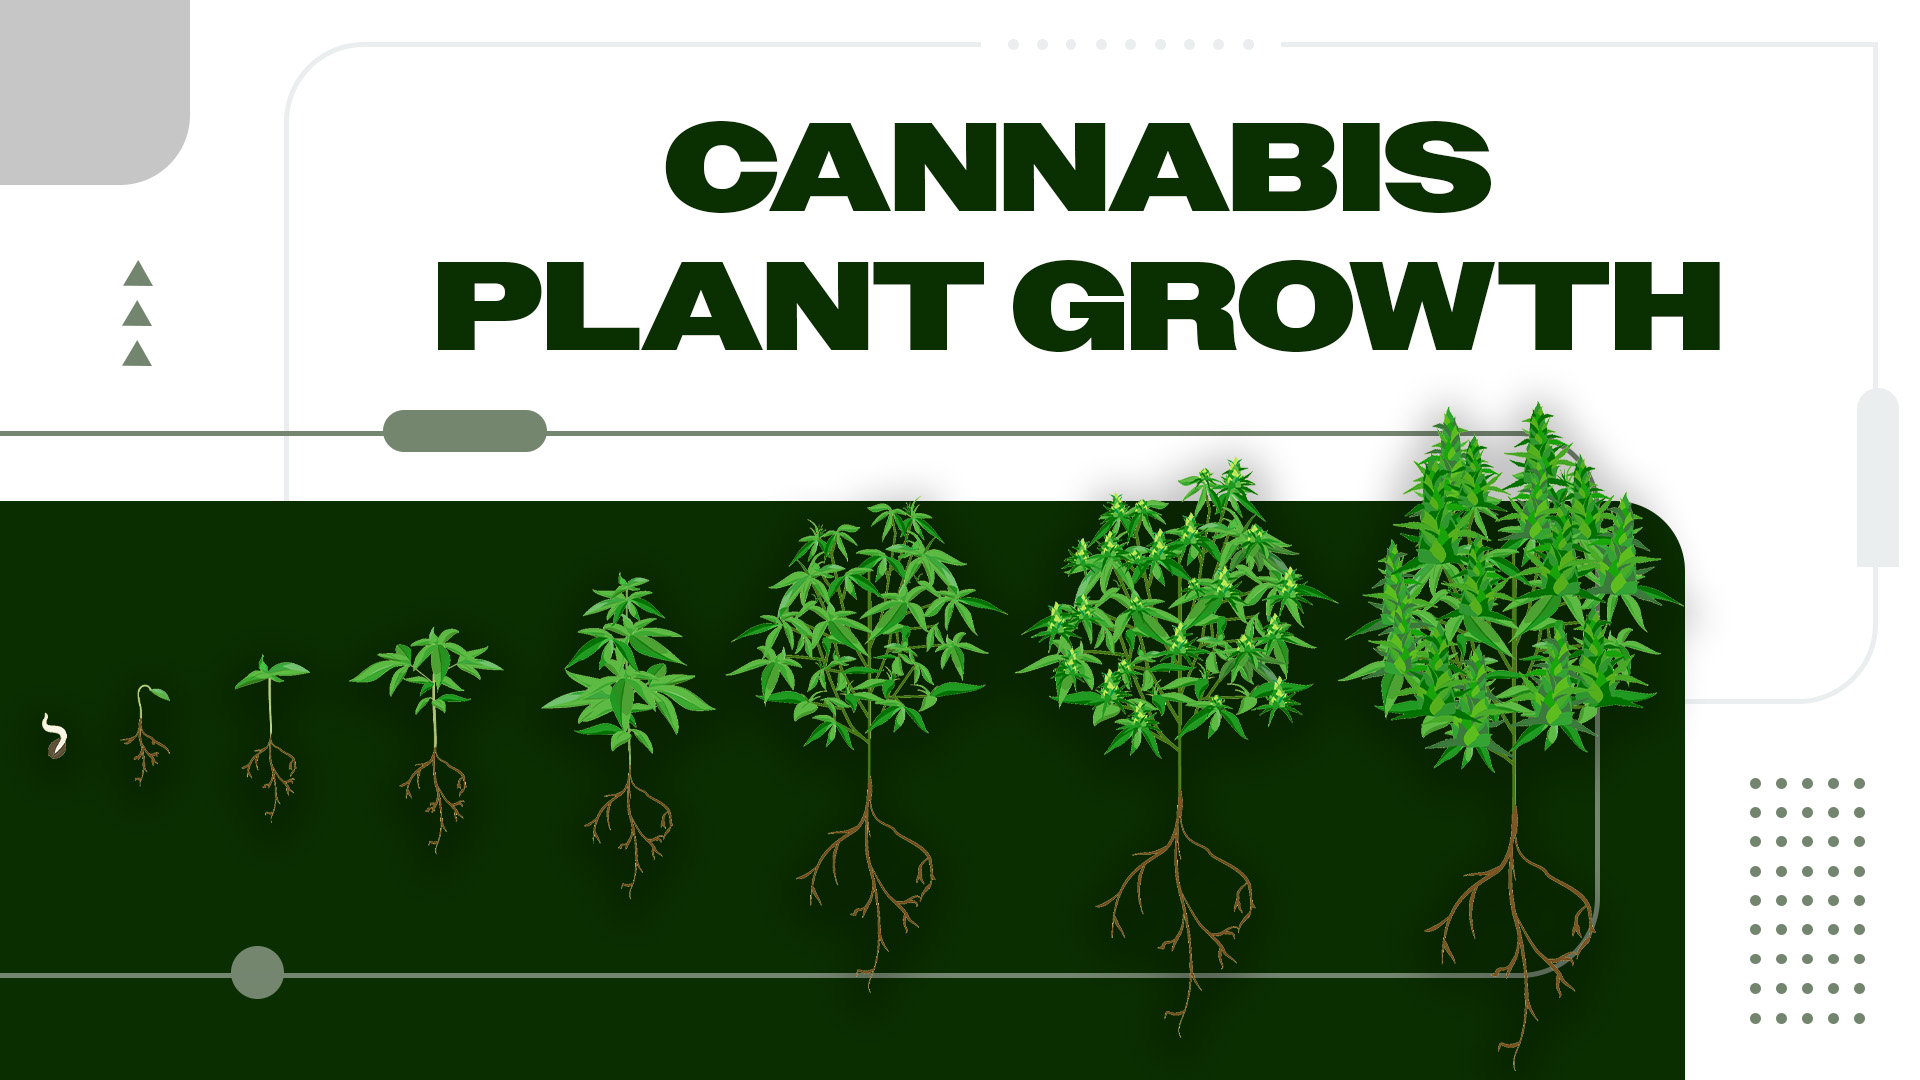
Growing cannabis from seed to harvest involves six distinct stages, each requiring specific care and environmental conditions. Understanding these stages helps you anticipate your plant’s needs and troubleshoot problems before they damage your crop. This guide covers the complete cannabis growth cycle with timelines, visual indicators, and practical tips for each phase. Cannabis Plant Growth…
Eating expired edible gummies typically won’t cause serious harm, but they may lose potency and develop changes in taste, texture, or appearance. The safety depends on how long past expiration they are and whether signs of spoilage like mold or unusual odors are present. Understanding what happens to gummies over time helps you make informed…
The statements made regarding cannabis products on this website have not been evaluated by the Food and Drug Administration (FDA). Cannabis is not an FDA-approved substance and is still illegal under federal law. The information provided on this website is intended for educational purposes only and is not intended to diagnose, treat, cure, or prevent any disease. It is not intended as medical advice and should not be considered as a substitute for advice from a healthcare professional. We strongly recommend that you consult with a physician or other qualified healthcare provider before using any cannabis products. The use of any information provided on this website is solely at your own risk.